Are you just as annoyed by all the ads when you roam the web? To put an end to this, I set up Pi-hole on my server with Docker Compose.
Pi-hole is free software with the function of a tracking and ad blocker and an optional DHCP server. Pi-hole is based on a Linux system and was developed for use on microcomputers in the sense of an embedded system.
This guide shows you the necessary steps so that you can enjoy an ad-free Internet.
Foreword
It was installed on my Gentoo server, but ultimately it will work the same on any distribution. Some Gentoo specific things I will mark accordingly.
I assume you already have Docker Compose installed.
Prepare directory
For the installation I created a directory in /opt. You can use any directory for this, but make sure that you adjust the paths for the commands accordingly.
mkdir -p /opt/pihole
cd /opt/pihole
Create Docker Compose file
In the directory we first create the docker-compose.yml file:
nano -w docker-compose.yml
Add the following content:
version: "3"

# More info at https://github.com/pi-hole/docker-pi-hole/ and https://docs.pi-hole.net/
services:
  pihole:
    container_name: pihole
    image: pihole/pihole:latest
    # For DHCP it is recommended to remove these ports and instead add: network_mode: "host"
    ports:
      - "53:53/tcp"
      - "53:53/udp"
      #- "67:67/udp" # Only required if you are using Pi-hole as your DHCP server
      - "8180:80/tcp"
    environment:
      TZ: 'Europe/Berlin'
      WEBPASSWORD: 'SUPERGEHEIM'
    # Volumes store your data between container upgrades
    volumes:
      - './etc-pihole:/etc/pihole'
      - './etc-dnsmasq.d:/etc/dnsmasq.d'
    #   https://github.com/pi-hole/docker-pi-hole#note-on-capabilities
    cap_add:
      - NET_ADMIN # Recommended but not required (DHCP needs NET_ADMIN)
    restart: unless-stopped
Adjust the TZ parameter in the file to your time zone. You should also assign a secure password to the WEBPASSWORD parameter. You will need this password later to log in to the web interface.
Start Pi-hole
Now it’s time to start Pi-hole:
docker-compose up -D
Start Pi-hole with the system
This part is Gentoo specific as it uses OpenRC.
Now create the file ‘/etc/init.d/pihole’:
#!/sbin/openrc-run
depend() {
        need net docker
}

start() {
        ebegin "Start Pi-hole"
        docker compose -f /opt/pihole/docker-compose.yml up -d &> /dev/null
        eend $? "Failed to start Pi-hole"
}

stop() {
        ebegin "Stop Pi-hole"
        docker compose -f /opt/pihole/docker-compose.yml down &> /dev/null
        eend $? "Failed to stop Pi-hole"
}
If you previously chose a different directory for Pi-hole than I did, you must change this accordingly.
Now let’s add the script to start the system:
rc-update add pihole default
Add adlist to Pi-hole
So that something can be filtered, you should add an adlist to the Pi-hole web interface. You can reach the web interface via the IP address of your server and port 8180, e.g. “http://192.168.3.2:8180”.
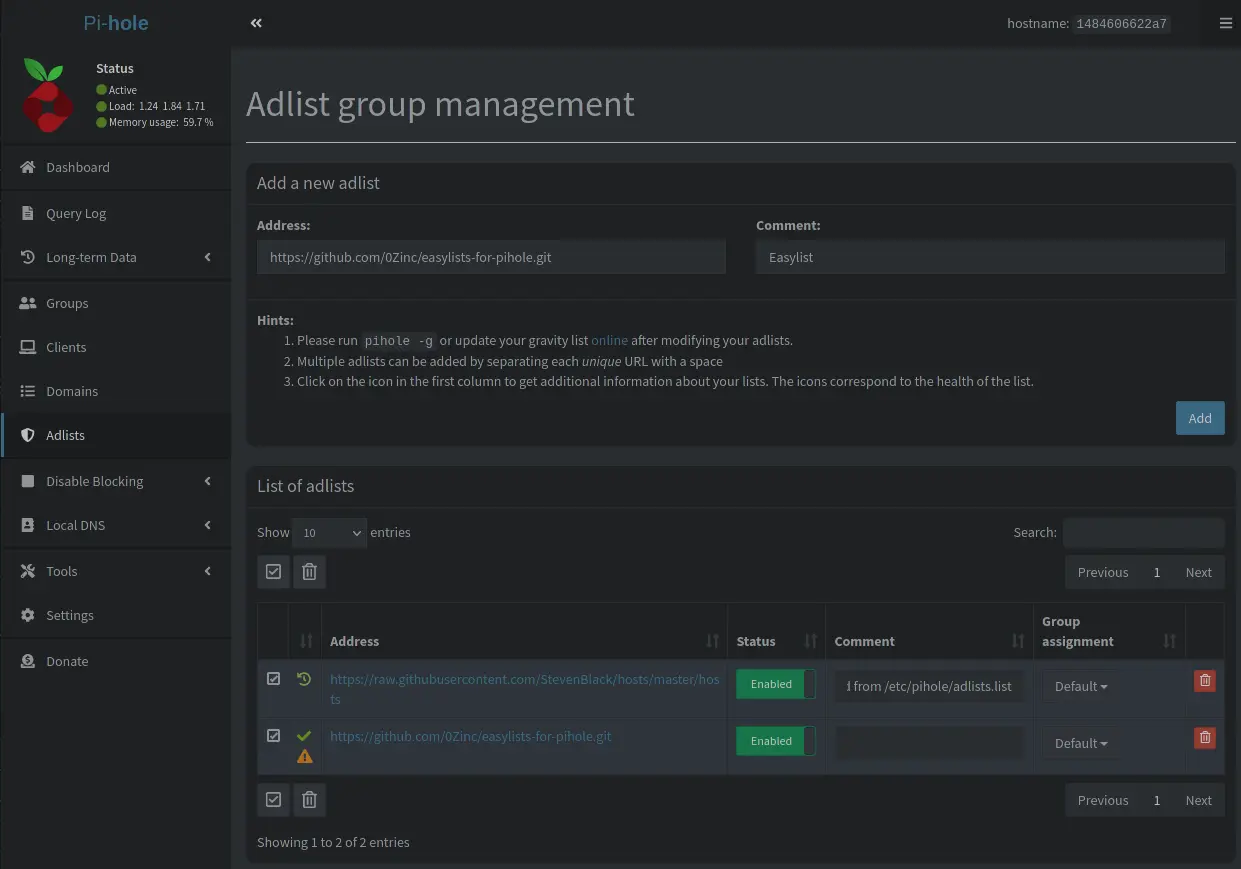
As seen in the screenshot, here I have the Easylist for Pi-hole. Of course, you can also add other lists.
The lists are automatically updated by Pi-hole at regular intervals. You can also trigger this manually at any time in the web interface.
Use Pi-hole as DNS server
So that advertising can be filtered through Pi-hole in the first place, you have to use Pi-hole as a name server.
In my case, I do this in my FRITZ!Box under “Internet -> Access Data -> DNS Server”.

Here, too, you must enter the IP of your server accordingly.
If you don’t own a FRITZ!Box, then simply enter the IP address of the [Pi-hole](https: //pi-hole.net/) servers. That should work exactly like this.
This activates the ad blocker for all devices that have been assigned an address via DHCP.
Update Pi-hole
Pi-hole will be updated regularly. You can see this in the footer of the web interface. To update Pi-hole we need to stop the server first:
/etc/init.d/pihole stop
After that we update the container:
cd /opt/pihole
docker-compose pull
Now start the server again:
/etc/init.d/pihole start
Conclusion
With just a few steps you get a really high-performance advertising filter on all devices in the home network. After the successful setup, you should deactivate all other ad blockers in the browser, because Pi-hole now takes care of for us.